Logging In
To log in to the WordPress Administrator Interface, where you’ll make content changes to your site:
In any web browser type: yourdomain/cms/login. (Note, this can sometimes be changed with additional plugins).
Type your username and password.
Dashboard
The WordPress Dashboard is the first screen you see after logging in to WordPress. On it you’ll find both status information and links to all the administrative areas of the site. When you click on Screen Options while on the Dashboard, you can customize it with security information, Google Analytics data, or a variety of other options.
Screen Options
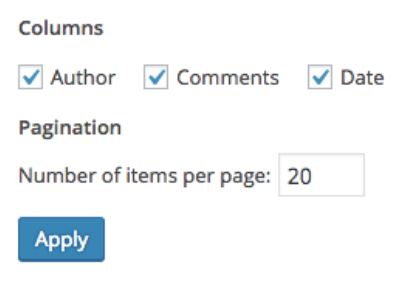
Screen options are a way to customize the WordPress administrator interface to customize the display. You can edit these on different pages throughout your site using the Screen Options tab in the upper-right corner of the Administrator Interface:

Index Pages
When clicking on any of the main navigation links, such as Posts or Pages, Screen Options will allow you to change the view for what displays in the table content, as well as the number of items that display on each page.
Individual Content Items
When editing an individual content item, Screen Options will allow you to hide or show various content elements that you may or may not need on a page. For example, if your theme is not optimized to show Author information or the Feature Images, you can uncheck those items to not display them on posts.
The WordPress Administrator Interface
Once logged in, you will see the WordPress Administrator Interface. This is where you make changes to your website. Some typical items that you will see include:
Posts. All content articles, categorized into blog posts, press releases, and other news articles.
Events. Past and upcoming individual events.
Media. Images and PDFs that are uploaded through WordPress.
Pages. Main site content such as the homepage.
Forms. Where form settings and content (such as your Contact Us form) are managed.
Appearance. Universal site settings or changes, such as your navigation.
Users. Management of all administrators and staff.
You may also have custom post types created by a developer. If that is the case, please consult your customized documentation created by your Project Manager.
Users
Out of the box, WordPress comes with the following user roles:
Administrator – somebody who has access to all the administration features within a single site.
Editor – somebody who can publish and manage posts including the posts of other users.
Author – somebody who can publish and manage their own posts.
Contributor – somebody who can write and manage their own posts but cannot publish them.
Subscriber – somebody who can only manage their profile and comment on the site.
Add User
From the WordPress Administrator Interface, hover over Users and click on Add New User on the left navigation menu.
Complete the form by creating a username, email address, first name, last name and password. Our security plugin requires a strong password, which can be generated at: https://passwords-generator.org/, if not given the ability to auto-generate one.
Remove User
From the WordPress Administrator Interface, hover over Users and click on All Users on the left navigation menu.
This page contains a list of all users in the system.
Check the box next to the user that you wish to remove from the system.
In the dropdown that is labeled Bulk Actions, select Delete and then click the button for Apply.